How To: Connecting To Amazon Business
Connecting Your Amazon Business Account to ManagedOrg's Donative
# Amazon Business
Go to https://www.amazon.com/?ref_=abn_logo1. Click on Account Details…

2. Click on Amazon Business settings…

3. Click on Groups

4. Click on Add Group
We will create a group specifically for this solution. This ensures everything is separated and does not affect your existing programs or flows.

5. Type "YourORG x Donative"
Make sure to replace "YourORG" with your organization name

6. Select Shared Payment Methods

7. Select Shared Addresses

8. Click on Add Group

9. The group is now created

10. Click on Back to

11. Click on More groups

12. Click on YourORG x Donative

13. Click on System integrations

14. Click on Set up system

15. Click on ManagedOrg-DirectOrdering
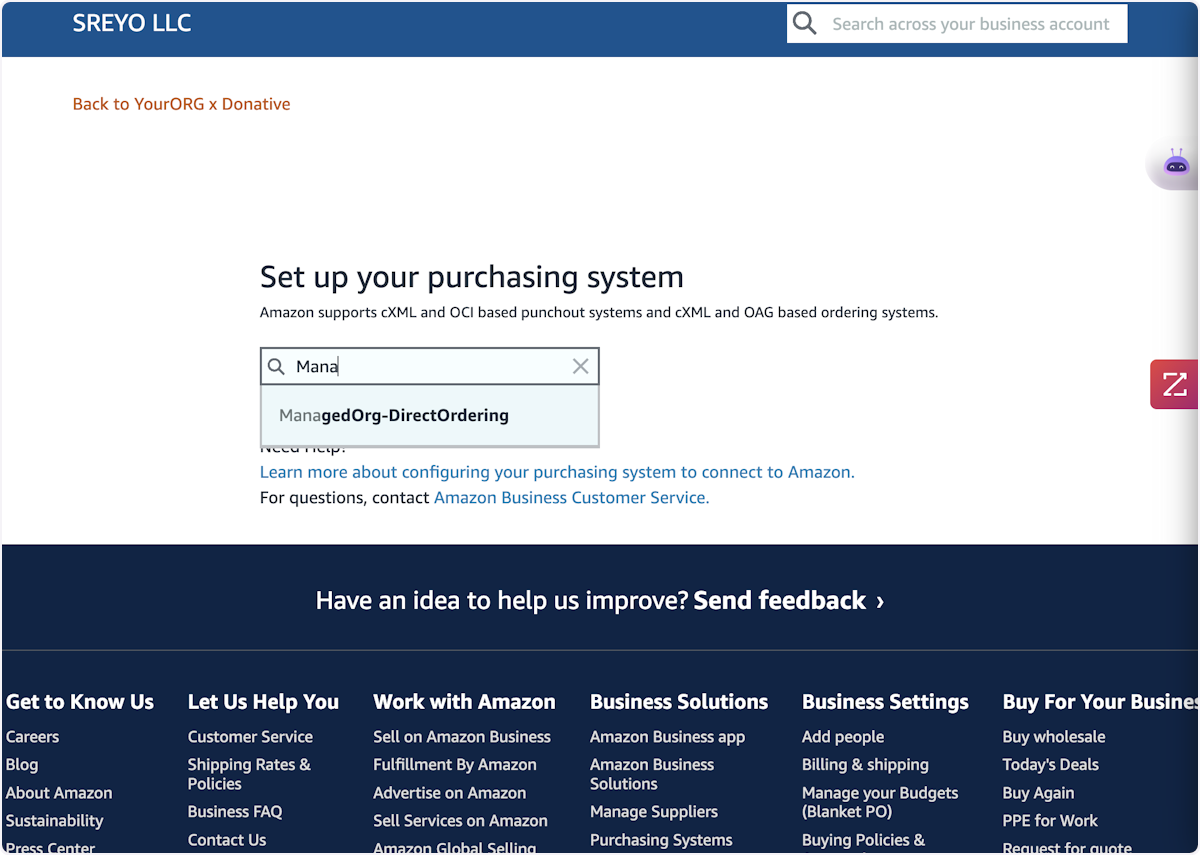
16. Click on Save

17. Remember this area, it should remain as Test
We will notify you when to change this to Active after testing.

18. Click on Back to YourORG x Donative

19. Click on Add people

20. Click on textbox

21. Type "[email protected]"

22. Uncheck Buyer (requisitioner)

23. Check Punchout buyer

24. Check Admin

25. Click on Invite people

26. Ensure person was successfully invited
If you are adding your own email to this, you can skip the next step.

27. Go to the email you set the account with, you should receive an email confirmation from Amazon.

28. Click on Back to YourORG x Donative

29. Click on Addresses and delivery preferences

30. Click on Actions

31. Click on Import address from your account

32. Click on Add an address

33. Click on Back to YourORG x Donative

34. Click on Payment methods

35. Click on Add payment method

36. Add your payment method
At this stage you can add a card or add a credit line. We suggest a credit line.

37. Add Credit Line
38. Click back to the root account

39. Click Pay by Invoice

40. Manage Invoice Templates

41. Manage Invoice Templates and Create New Template
We will be creating a new template for you. This ensures that this solution will not affect your current day-to-day purchasing and current Amazon Business process.

42. Go through the instructions

43. Pick Separate per group

44. Select the Donative group we previously set up

45. Once completed, go back to Business Settings and the Donative Group

46. Click on Tax Exemption & Licenses

47. Click on Add exemptions

48. Add Tax Exemption Certificates if you already haven't done so
Make sure to at the very least the certificates for the states you plan to accept donations for
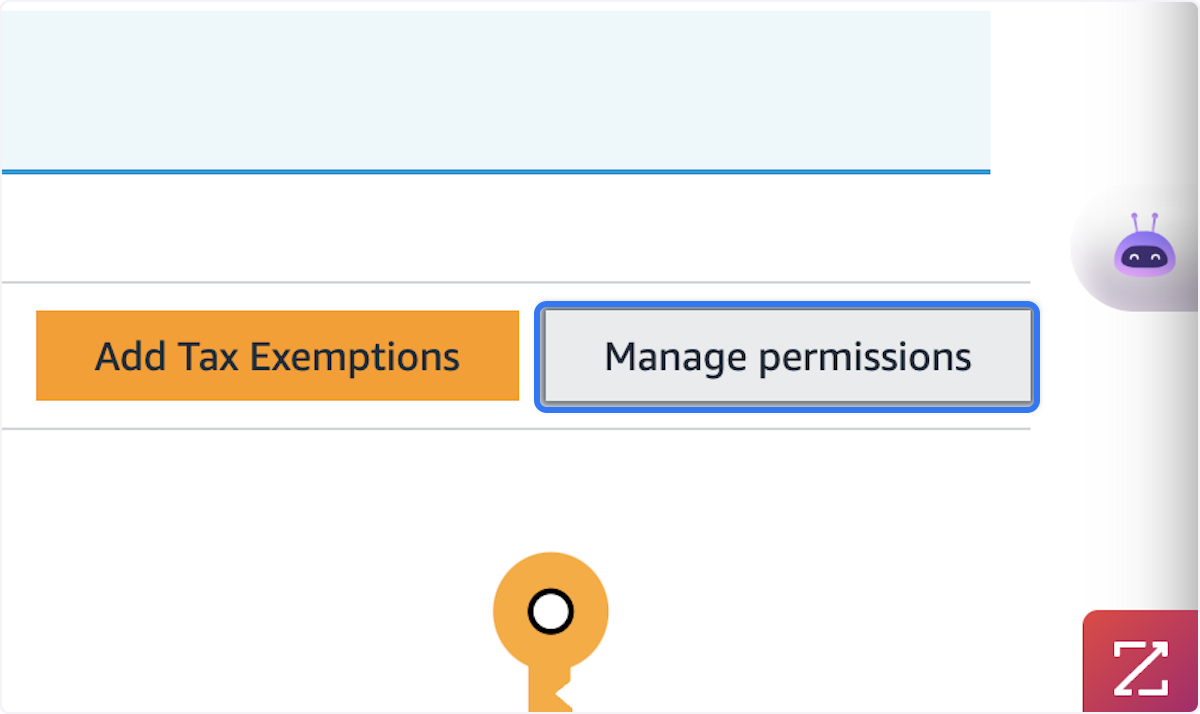
49. Click on Manage permissions

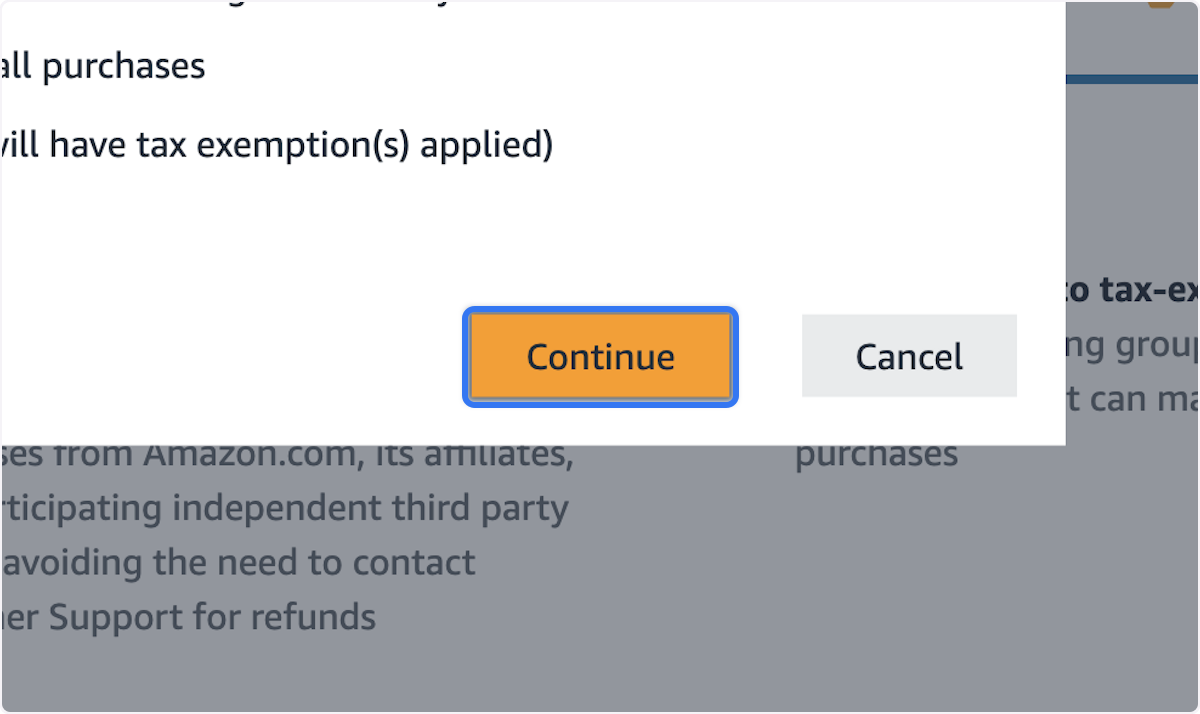
50. Select Enabled and will be applied to all purchases

51. Click on Continue
52. Click on Back to YourORG x Donative

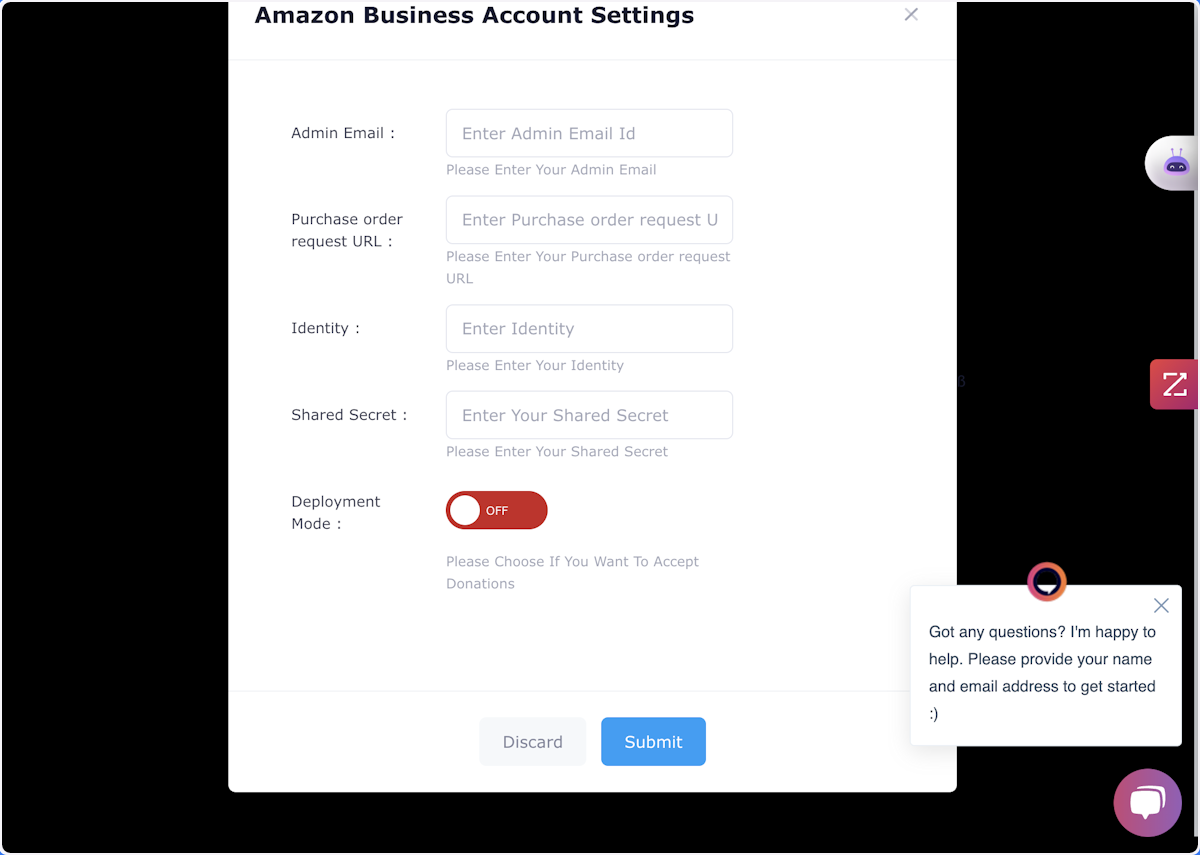
53. Click on Purchasing System

54. Stay on this page and keep this tab open

# Managedorg
Go to ManagedOrg Admin Portal
55. Click on Amazon Business Account Settings

56. Click on Link Existing AB Account

57. Click on Connect to Amazon Business

58. Click on Allow

59. Success! Your account is connected…

60. Success! Please close this tab and go back to your Admin Portal…
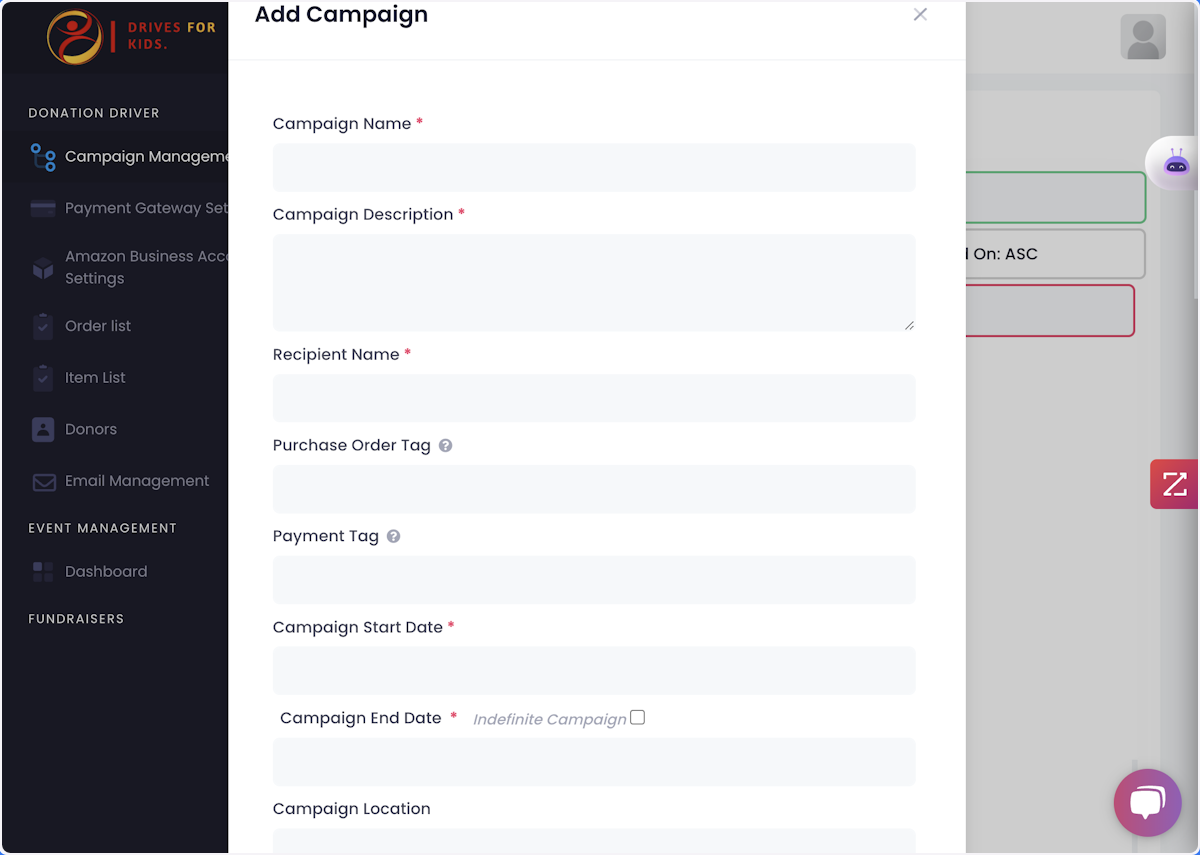
At this stage, a 5 minute timer has started to establish the connection for security reasons.

61. Go back to ManagedOrg Admin Portal
62. You should see this screen
63. Add the admin email we added to the group ([email protected])

64. Go back to Amazon Business Tab and start copying and pasting

65. Copy + Paste Shared Secret
# Managedorg
Go to your ManagedOrg Admin Portal - https://yourorg.managedorg.io/
66. Click on sharedSecret

67. Paste input

68. Paste input

69. Pick your region and keep deployment mode off for now

70. Click on Submit

71. See the Success Banner

72. Click on Add new Campaign

73. Congratulations! You can now create your first campaign and add products!